Showing posts with label cooking. Show all posts

Tuesday, 13 September 2016

make your own granola

granolagranolaorchard mixalmondsnuts granolagranolagranolagranolagranola

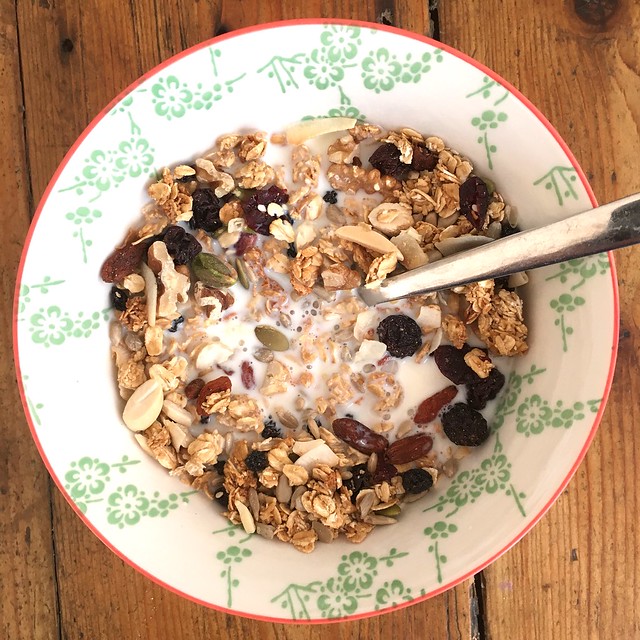
This winter we all switched to oats for breakfast and we haven't looked back. We eat it as oatmeal or muesli with honey, brown sugar, fruit or yoghurt on top.

Oats are delicious and they're a superfood so I feel healthy and virtuous eating them. And its made me extra happy to see the boys head off to school with a healthy filling breakfast. I like that they are good for Mr F's cholesterol too.

Check out this link which explains the many different ways oats are fabulous for you.

I like my oats granola-ed too. If you make your own you can fill the granola with other healthy stuff you love.

When I made my first batch on a whim I just used what I could find in the pantry, I had some leftover cashews and currants and slivered almonds, sultanas, coconut and sesame seeds and we always have maple syrup and brown sugar for cooking and pancakes.

You can't always rely on pantry staples though and this is my current quick, cheap, low fuss method. Buying the additions as mixed bags of nuts and seeds and fruits makes it quick and easy, they sit in the cupboard until I make another batch and its cheaper to get a good variety. Much cheaper than store bought granola too.

I've added a list below to give you some other ideas for ingredients. You could use as many or as few as you liked. The best thing about homemade granola is tailoring it to your own tastes, you can lower the sugar content, omit the salt, make it nutfree and add or leave out anything you want. This version is high in additions. If there are too many for you just add more oats.

Home Made Granola

Ingredients

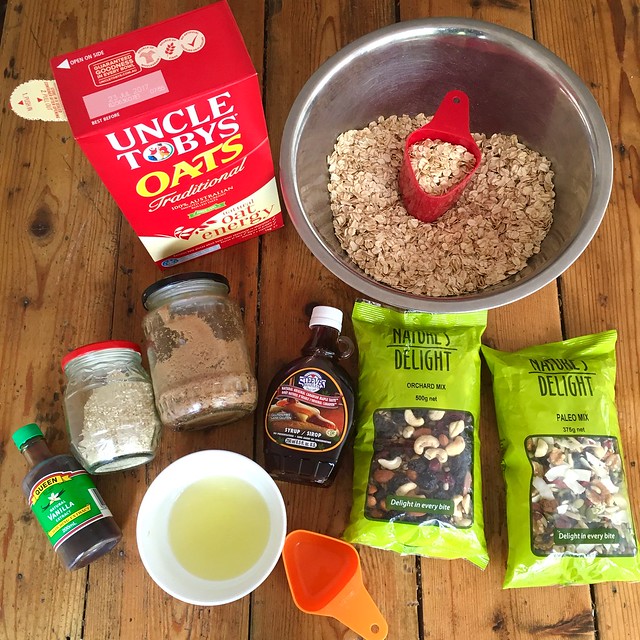
5 cups traditional oats (don't use instant)
1/3 cup maple syrup
1/2 cup brown sugar
1/4 cup vegetable oil
2 egg whites (optional, for crispiness)
1tsp vanilla extract
1tsp salt

2 tablespoons sesame seeds
1 pack Paleo mix or similar
1 pack Orchard mix or similar or see the list of additions below, I like pecans, goji berries and apricots.


Method

Preheat oven to 180 degrees celsius fan forced.

Measure oats into a large bowl. Add oil, maple syrup and brown sugar. Add egg whites and salt and vanilla extract.

Mix to coat.

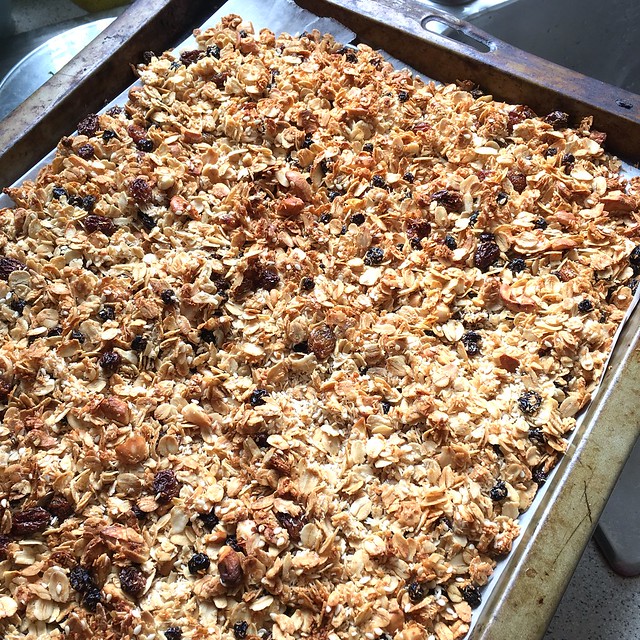
Lay out oat mix on baking trays. Use a couple so that you don't have to make the oats too deep and they all get cooked.

Cook for 15 minutes on 180 degrees.

Check at ten minutes so it doesn't get burned.

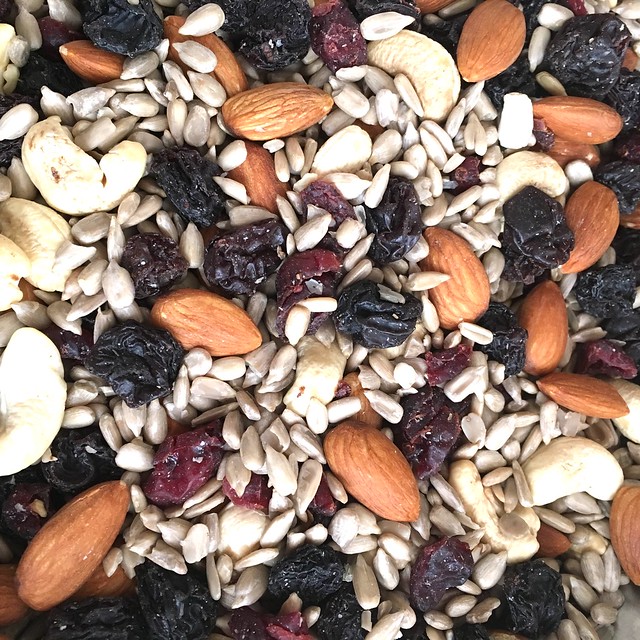
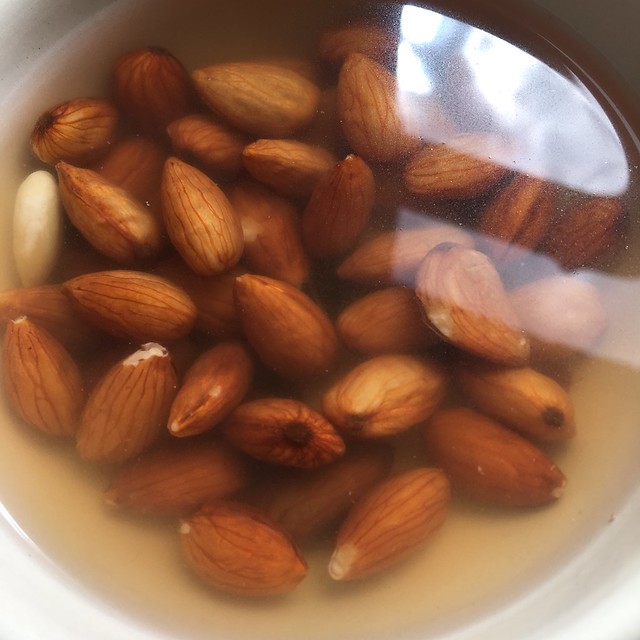
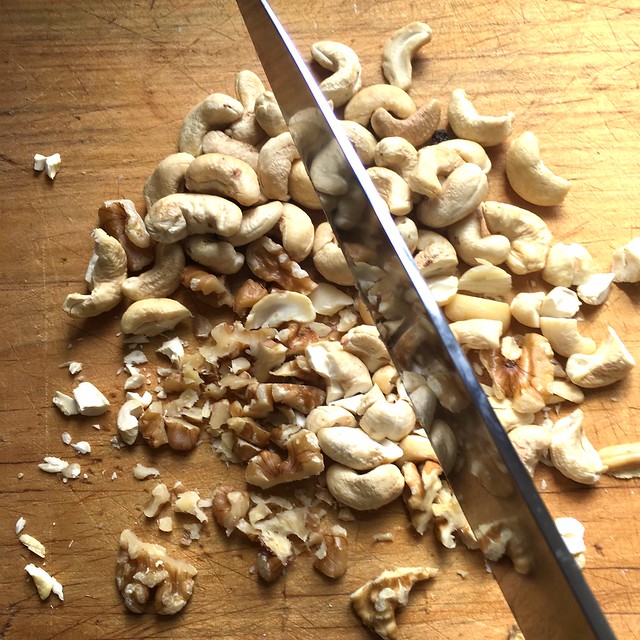
Meanwhile some of the nuts in the premixed packs I buy aren't peeled or chopped. I soak the skins off the almonds (cover with boiling water for five minutes or until the skins just rub off). And then I chop them all into smaller pieces. You can sliver your almonds too if you have the patience!

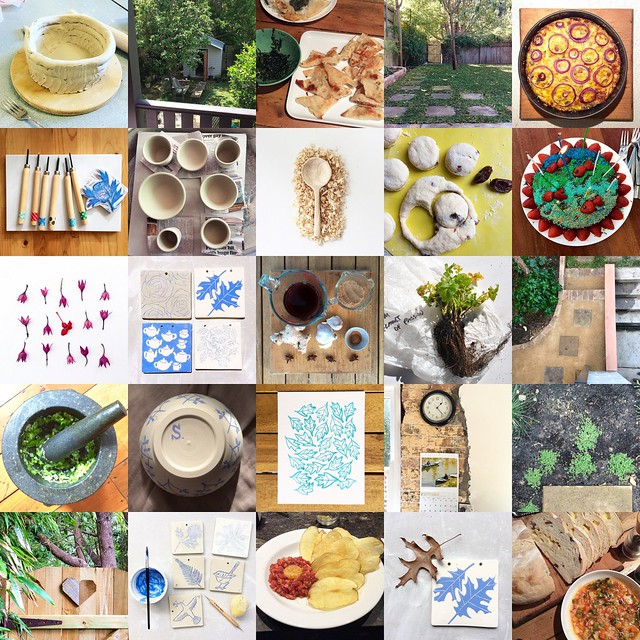
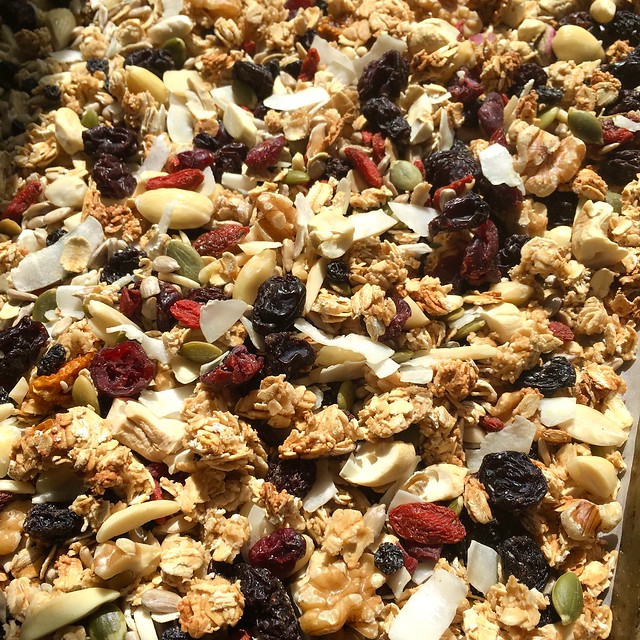
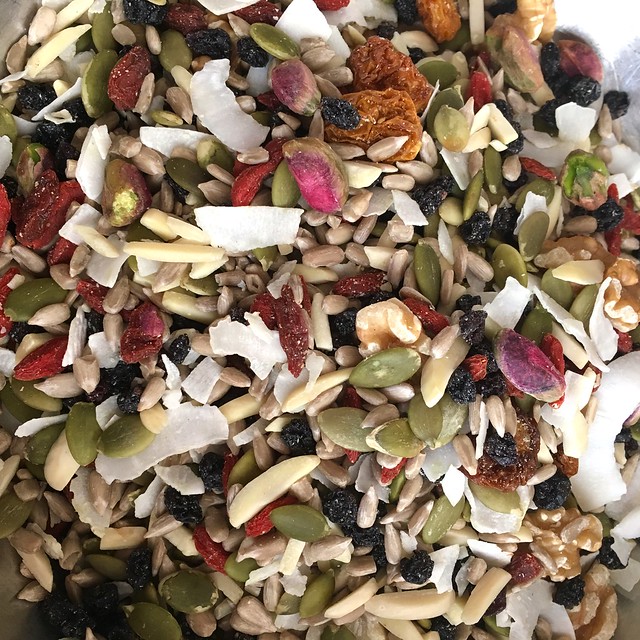
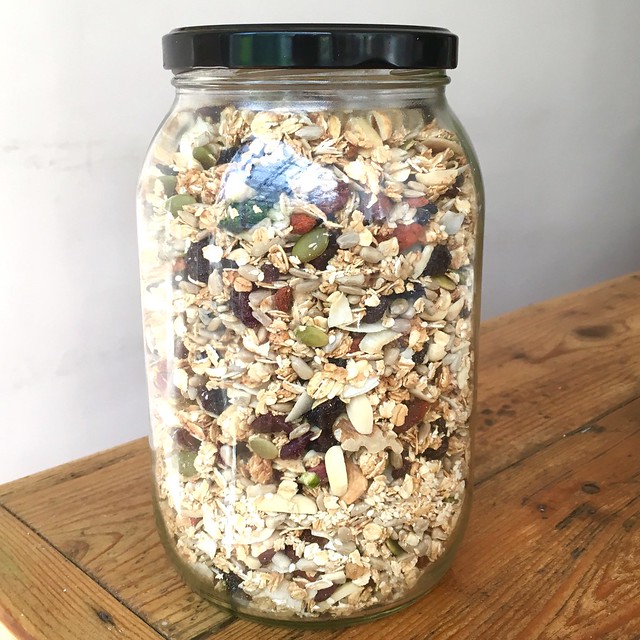
I use the premixed paleo and orchard mixes because they give me a really good range of additions without buying them all individually. I like the variety and its simple. Alternatively, and if you are going to make this regularly, buy the things you like in bulk and mix them yourself. My mixes have walnuts and cranberries, pepitas and coconut amongst other things, you can see them in the pics above.

Turn oven down to 160 degrees Celcius.

Add the mixed nuts and seeds and fruit and stir through. Cook 8 minutes.

I cook the oats first and then mix in the additions later once I've lowered the heat. Its easy to burn the sultanas and other fruit and while I like mine cooked they can cook too much. If you don't like your fruit cooked add it to the crunchy oats at the end. Or add the nuts earlier and hold back the fruit.

Make it how you like it!

Take out and turn and cook another 10 minutes. Keep going till its like you like it, but be careful not to burn it.

The added oil and egg whites help to make the crunch so if you don't like it crunchy omit them. I've made a batch without oil too and its fine if you want to be healthier. Similarly lower the sugar content or swap the syrup and brown sugar out for honey or another sweetener.

Granola Additions

As I've said, the best thing about homemade Granola is tailoring it to your own tastes. To me the goji berries are especially nice toasted, they turn into little soft crunchy versions of themselves. I've always avoided them as a health fad, but they're delicious! I also like nuts like cashews and walnuts in my granola for their nutty crunch, and I cut up dried apricots for the burst of sweetness they spread through each mouthful.

Here's a list of other things you could put in.

Grain - Spelt, Barley, Wheat, Oats

Oils - Vegetable, peanut, grape seed, olive.

Egg whites - for crunchiness. Optional.

Seeds - pepitas, sesame seeds, linseed, pumpkin seeds.

Dried fruit - currants, sulatanas, dried banana, apricot, dates, pineapple, pawpaw, cranberries, blueberries, apple, dessicated or flaked coconut, dried figs or dates, goji berries.

Sweetness - maple syrup, honey, brown sugar

Nuts - almonds, cashews, pecans, hazelnuts, macadamias, walnuts, pistachios

Flakes - wheat, wheatgerm, bran, quinoa

vanilla extract, cinnamon

Tuesday, 1 March 2016

home made dips - baba ganoush

UntitledUntitledUntitledUntitledUntitledUntitledUntitledUntitled

Around here we love dips, we have lots of favourites which we eat with crudites, crackers and corn chips. We spread them on toast and sandwiches and add them to meals.

So the small store bought tubs don't last long and when we're entertaining they go even quicker.

All of which led me to experiment with making my own. And as I've found its quick, easy and cheap. I've been really delighted with how fast and unfussy they are to make so I thought I'd share.

I'm starting with the one I've been making most, and where the recipe I've been using seems pretty failsafe. I must have made it ten times in the last six months.

Baba ganoush is smoky eggplant in a tahini base with a squeeze of lemon to give it zing and a slight garlic tang. This is one of those home made dips that is better made than bought. And its lightning fast when you're up to speed.

Baba Ganoush

Ingredients
1 medium to large eggplant
1/4 cup tahini (abt 1 and half dessert spoons)
juice of 1/2 lemon (just less than 1/4 cup)
One garlic clove crushed or fine sliced

Method
Cook eggplant over a flame till skin burns and goes black. I have a gas burner and I sit the eggplant on the hotplate, over the naked flame, turning it until all the skin is blackened. When grilling like this I've learnt not to use half measures. A really blackenend burnt skin makes it much easier to peel and gives a better flavour.

It can be messy on the hotplate as the juices run out but its easily cleaned.

For those of you without gas ranges, I had a look online, and it seems cutting the eggplant in half and grilling (broiling) it in the oven is the way to go. Place the eggplant on a baking tray with skin side up and cook till blackened.

Leave it to sit until cool and then peel off the skin. If you've really blackened it it should come away easily. I cut away the stringy bit from the stem down about an inch and discard that too.

Once you have your eggplant flesh add it to the food processor and give it a quick blitz, then add tahini, lemon and garlic and process. It doesn't take too long and I like to leave a bit of texture.

You could tweak the lemon or tahini at this stage depending on taste.

Turn out into a bowl and eat, or chill it a bit first. Yum!

The garlic and other flavours develop over time.

Lucky for me my eggplants have started bearing these beautiful purple fruits so I will be able to trial home grown homemade baba ganoush. And as you know that's the sort of thing that makes me very happy.

Wednesday, 20 January 2016

2015

2015 part 12015 - part 22015 - part 3

Each year around this time I write a post about the year just passed. I like to do a round up of all the creative work I've done during the year because I'm usually surprised at how many projects I managed to squeeze in. For someone who always feels like nothing get finished its a very satisfying to see what I have achieved.

I'm thinking that this year will be the opposite though...

Its been a strange time in many ways, a big and hard year where my creative energies were redirected into different areas.

My Dad died. That has been a huge and devastating loss and coloured my whole year.

Also this year my beautiful daughter sat her HSC which was stressful for her, but also for the family. Its a tough year for kids and a lot of my time went to helping her through it.

In 2014 we began the process of renovating, the builders did the bulk of the construction work in the last three months of that year. Last year was all about finishing the last bits, ceilings, rendering, electrics and painting. Mr F and I did all the painting work ourselves. What a trek! We also organised all the trades, and were blessed with lovely people all round.

On top of that I spent more time in my other role as financial manager of our family business. Phew, I'm exhausted just thinking about 2015!

So something had to give and it seems to have been the creative stuff.

I did do little things along the way, mostly motivated by courses I signed myself up for when I was feeling deprived or workshops I taught myself! I find courses and workshops a great way to kickstart creativity. Each time I forced myself to make a little flame ignited which got me back to a making mindset.

One big creative project I am proud of this year is reclaiming my garden. A lot of hours of work have transformed it from a devastated and compacted building site to a beautiful leafy retreat again, with a productive garden down the side and a new garden potting shed. I love it.

And most excitingly I have my own kiln and started selling small ceramics almost accidentally from my instagram account.

But more of that later. I see doing these mosaics that there is quite a lot of undocumented making. A broken camera, a full computer and those time constraints have conspired to keep me from updating my makings as I go along.

Another post I do religiously each year is a wishlist post, where I talk about what I hope to do in the next year. This year I'm planning some serious crafting. I need it in my life and with some major projects out the way I have some breathing room to start. I can't wait. Come back soon and see what I'm planning!

*

My other annual roundups: 2014, 2013, 2012, 2011, 2010, 2009 and 2008.)

Sunday, 13 December 2015

bread and butter pickles

imageClose up picklesBowlimageFullSizeRender.jpgPicklesIMG_5009.JPGCheese andimage

I love how seasonal produce changes the menu from month to month. This month its all about home grown cucumbers and tomatoes and the other night I made a pasta sauce with one and a salad with the other. It is so satisfying to make an entire dinner with garden pickings and it was really delicious.

Around here we've been having those cucumber salads every other night. I just peel the cucumbers, take some of the seeds out, chop roughly and then cover them with a thai style lime dressing, or a squeeze of lemon, and grind of salt and a splash of olive oil (my go-to salad dressing).

Sometimes though with a glut of fresh produce its hard to keep up and its good to find other ways to use your excess bounty.

Another way to use cucumbers is this simple preserved pickle that I made for the first time last year. I made lots of jars but we went through them quite quickly, eating them on our sandwiches and having it with cheese platters until it was all gone. Luckily this is delicious, and quick and simple to make. I made my first batch the other day and hope to get another in before Xmas.

Here's how I do it.

Bread and Butter Pickles

7 lebanese cucumbers ends removed thinly sliced
2 onions brown or spanish thinly sliced
11/2 tbsp salt

1 tbsp mustard seeds
1 tbsp coriander seeds
1 tsp turmeric
2 cups apple cider vinegar
1 cup caster sugar

I use my MagiMix to slice the cucumbers quickly, but you could use any method. I sliced them and two onions, one brown one spanish for colour. I put the whole lot in a bowl and sprinkled them the mixture with a tablespoon and a half of salt. Then I covered it with my handy beeswax kitchen cover and put them in the fridge overnight. Took me abt ten minutes for this stage.

The next day is bottling day so put the cucumber onion mix in the colander to drain, squeezing down on it occasionally to get the liquid out.

Meanwhile put a large pot on the stove and add the apple cider vinegar, mustard seeds, coriander seeds, turmeric and sugar. Heat until all the sugar dissolves.

One the mixture is clear add the cucumber mix to the pot and bring it to a simmer.

Meanwhile get your jars ready. I like to put mine through the dishwasher to sterilise them or put them covered by water in a big pot which I boil for a minimum ten minutes.

Fill the jars with cucumber pickle mix and put the lids on tight. I choose jars with metal lids that have the sealing clickable lids. I then put them in a big pot submerged in hot water and boil for 20 minutes. A lot of the recipes don't call for this but I can't fit all my jars in the fridge and I like to know they will keep. When you take the jars out that clickable seal on top should be down. It should release with a pop when you open your pickles.

Enjoy!

Tuesday, 25 August 2015

what to eat - winter

UntitledUntitledUntitledUntitledUntitledUntitledUntitledUntitledUntitled

I love food and I love cooking... sometimes.

I have bursts when I am inspired when I search for new recipes and new flavours, and I love the whole process of chopping, stirring, cooking.

But I also have times when cooking everyday for five people is a chore. And that's when Mr Flowerpress and I just cook old favourites, quick tried and true meals.

I find that half the battle in those times is deciding what to make.

This little post is a catchup for me as much as you, keeping track of all the good stuff we've been eating this winter. A reminder of all the new and interesting food we've cooked, those recipes I need to remember and cook again!

Like most people I search for warm, filling comfort food in cold weather. This winter has been no different, soups, casseroles and pies have featured.

I have had a craving for fennel, such a winter vegetable and it seems to feature at the greengrocers much more these days, especially in my Italian neighbourhood. One night I was inspired to make a chicken and fennel pie, inspired by a favourite Karen Martini recipe for Chicken and Mushroom pie. Not everyone around here likes mushrooms but they all like fennel. It was a winner and I made it for guests who came a week or so later. I might write up my recipe here one day as I actually took some photos of the method the second time round. And its simple. That plaited top is actually quick to make but looks so pretty.

Another new recipe Pea and Feta fritters is a simple, quick family filler. I made this again last night with Colcannon, a cabbage and mash recipe. They made a really quick and filling vegetarian meal.

A great vegie dish I make often is my old favourite Minestrone. Miss A asked for this in the week she was doing her trial exams which made me happy. The recipe is really simple. I will blog it sometime. I made it with this amazing cheese bread from a video I found online. Mmm, that went quickly!

Speaking of vegie recipes, have you cooked any Ottolenghi recipes. I tried his Cauliflower Cake. That's it at the top of the page. Isn't it beautiful. It was delicious, vegetarian, quite unique, and very popular with the troops.

My sister gave me a Luke Nguyen book for my birthday last year. I love Luke's food and the recipes are delicious so I've made a couple more than once - the Chicken and Lemongrass (SO delicious and easy) and these Chargrilled Pork Skewers (yum!).

My brother is a great cook. He made some delicious gyoza type dumplings for me a few months ago. I tried to replicate them one night and had them with delicious Kewpie Japanese dressing (from Coles in the Asian section). Deeelicious. I've got it written down somewhere. Really simple but effective. Must share that.

The other thing I've been cooking are homemade dips. We love dips around here but with three teenagers they go pretty fast. Homemade is quick, cheap and so easy. I'm slowly building my repertoire. Homemade hummous and baba ganouj are delicious and easy. Another blog post due on those.

Apologies for my underwhelming food photography. I mostly cook at night and am way too hungry to style anything and I know it looks pretty unappetising in the low light. But you get the idea.

Out of the house I've had a few memorable meals. We've really enjoyed eating at Jasmin1 in Leichhardt, fantastic Lebanese food, the best I've had, the famous dumplings at New Shanghai and a new place Luyu and YumYum in Newtown (where I tried the caviar dumplings) and recently we discovered Afghan takeaway from Bamiyan in Five Dock. What a fabulous cuisine (and the Afghans make dumplings too!) I'd never tried it before. Must go back and taste test again!

I'd love to hear what you've been cooking. I hope I've inspired you to try one of these recipes. And don't forget to look in my Recipes section for my own recipes and others I like to cook.

Monday, 5 January 2015

2014

My creationMy creationMy creationMy creation

Its one of my annual New Year traditions round here to look back over the last year's creative efforts. Its so interesting to scroll back through my Flickr account and see what I've been up to.

I'm always surprised to see how much I've actually achieved over the past twelve months. It really helps combat that feeling that I'm not getting anywhere!!

In the case of 2015 the last quarter of the year was consumed with renovation which made getting anything done harder, though ironically at the same time I took on a market, some new designs and more workshop teaching including my Finders Keepers spot, and spent a week away looking after my Mum. Somehow it all worked out though! Whew.

Its very exciting for us that this year, when we return from holidays it will be to a bigger house, with more space to do our thing! And when I get back I won't be sharing my workspace with builders. Nice as they were, that was a bit exhausting. So double yay!

We still have lots of work to do to finish the renovation, but the builders and the structure they've made are just about complete. We are still walking around marvelling at the extra space and light, pinching ourselves really, and looking forward to time alone, to enjoy it, to make it our own again. I can't wait to get the garden back to its old self, or rather its new self, with level changes and different aspects. Its going to be fun.

Some of you will have been following along on instagram, but I can't wait to share some pics on the blog.

2015 will hopefully bring a wired in kiln of my own, and more time to play and experiment with clay. Looking over my mosaic I can see how much this new making consumed me this year. I had so much fun exploring the different possibilities for decoration, finding how my style translated to ceramics.

If anything it has reinspired my other making, I love the way my textiles and clay complement eachother. Both are so tactile and usable in my domestic world too. Love, love, love.

This was the year of cheese too! Sadly the domestic restrictions have put a damper on my cheesemaking, but I'm hoping the new year will see some more. It was a delicious pastime, easy and worthwhile. A new larger kitchen will make this easier.

In 2014 we were blessed with lots of new babies in the family and I made two baby quilts, one for Sid, one for Astrid and a baby wrap for Zoe. Little Frankie arrived too late in the year/renovation, but I haven't forgotten him!

My other great breakthrough this year was in clothes making, and pattern drafting. I haven't even blogged or photographed my last make, a Fancy Tiger Crafts Sailor top, but I did wear it to my Finders Keepers workshop, also unblogged. Hopefully I can catch you up on all that stuff in the New Year. I think I need to sit on a beach and think about what my goals and plans are for next year.

Thanks for reading this far, and for spending time with me in 2014, I wish you a Happy and Creative New Year. Here's to a creative 2015!

(To see what I made in other years here are the links: here's 20132012, 2011, 2010, 2009 and 2008.)

Wednesday, 3 December 2014

apricot jam recipe

apricotsinstagramapricot jamapricot jamapricotsapricot jamapricot jamapricot jamapricot jam

I make apricot jam every year. There is nothing like homemade apricot jam, have you tried it? It is delicious, like golden summer in a jar. I savour mine all year on my toast until that last precious jar runs out.

Because of the timing of the apricot season it is a tradition that marks for me the last weeks of the year when everything is on fast forward and the lovely slow days of summer holidays beckon. Its always hard to fit a batch of jam into that crazy mix, but its imperative, because I'm away after that and its my only chance for a year of jamminess.

On the weekend I made my annual batch of apricot jam. It was quick and easy and worked beautifully. The jam gods were smiling on me.

I looked at those lovely glowing jars, and I thought about all the people I know who love apricot jam, and the smiles on their face when I gift a jar, and I decided to make another two batches. In my experience small batches work best, I've been burned trying to double or triple up so I don't do it anymore.

So jam making is really not that hard. And if you haven't made jam before then apricot is the perfect place to start. My recipe is cobbled together from a few places, jam recipes are basically half fruit/half sugar. This year I based my quantities and most of the technique on Stephanie Alexander's recipe from the Cooks Companion (here on Nigella's site).

This is how I make it.

Apricot Jam

1.5kg apricots, quartered, seed and stem removed.
1 cup water
1.5kg sugar
juice from half a lemon, abt 2tbsp

Take the apricots and rip them open to remove the stone and stem, then rip them into smaller pieces. You can do this with a knife but I find it quicker and easier with my hands (that photo above of neatly cut apricots is from another year!).

Put those apricots in a big stock pot. You want a big pot for jam so when it bubbles up it doesn't overflow.

Add the juice of half a lemon, about two tablespoons, and one cup of water. Put the pan on to simmer till the apricots are soft, about twenty minutes.

Meanwhile warm the sugar in a low oven (about 100 degrees celsius) for about ten minutes, till its warm to the touch. You don't have to do this but its a simple step and it keeps the jam from cooling.

Take the stones from about half the apricots and crack them open to reveal the kernels then wrap these kernels in a piece of muslin or light cotton (vintage sheets make a good muslin bag) and throw into the pot. The kernels help impart pectin which is the magic setting ingredient. The lemon juice does this too.

Once the apricots collapse squish them up a bit and add the warm sugar, stirring so it mixes through.

Then turn the heat up to high and bring to a rapid boil. You want your jam really hot so it reaches setting point. This takes about 15-20 minutes. Keep stirring so it doesn't burn on the bottom of the pot. I use the Sally Wise hint about adding a couple of stainless steel forks to the pot to help avoid sticking.

Don't walk away and leave the jam at this point. You do not want to burn your jam!

I test jam set by putting two saucers in the freezer and when I think the jam is set I take one out and smear a bit on a my very cold saucer. Leave for a moment and then run your finger through the jam and if it doesn't flood back in where your finger has been, and if you can sort of push the jam so it wrinkles up then your jam is set. Don't worry if it doesn't seem fully firm when you put it in jars as this process continues as it cools. Keep trying this every few minutes swapping the saucers back into the freezer until you have success.

Checking set is really the only tricky bit in this process, but you get more confident about it as you make more jam. You can also put a tablespoon of jam in a small bowl and put it in the fridge, this should set a bit and show you are on the right track.

I watch the jam as it boils and there is a point where you see the bubbles change texture, they look stronger, more toffee like. The foamy watery layer has died down and you can see the sugars turn glossy.

To sterilise my jars I put them sitting upright in a big stock pot with watering covering, lids off but in the pot as well. Bring them to the boil and boil for at least ten minutes. Its easy to have them on another hotplate as you make your jam so they are ready at the same time. Turn the burner off when they are done and take them out with tongs when you are ready to bottle.

Remove the muslin bag and forks, and jar up the jam while its warm. This helps to seal the jars. I save my jars obsessively all year round, I like the recycling aspect, and I love a mishmash of jars, but you could buy some from a kitchen shop if you wanted them all to match!

Now stand back and admire your beautiful golden orange apricot jam. Perfect on a piece of pane di casa from the local bread shop!