Showing posts with label tutorial. Show all posts

Tuesday, 18 August 2015

homemade orange spray

UntitledUntitledUntitledUntitled

I'm a big fan of natural cleaning in my home. I think homes like gardens are safer, healthier and nicer places without chemicals.

So I always buy 'eco' cleaners which have more natural ingredients and are gentler on the environment. In some areas though I've experimented with making my own so I know exactly what is going into the product and to save money. I've been surprised at how simple the recipes for natural cleaners are.

Previously I've made bathroom soap and clothes detergent. The clothes detergent is a standout, we haven't gone back since we started making our own. If you haven't tried it do! A batch gives us nine or so bottles and saves us hundreds of dollars a year. Our clothes are just as clean (or even cleaner actually since our old washing machine blew up this year and we invested in a new front loader!). And its quick to do.

I've always hated manufactured smells too, which is one of the nice things about homemade cleaners, you can use natural scents or leave them unscented.

Similarly home made soap is a luxury, and one I must get round to making again. It also makes a lovely gift.

In the kitchen I often use bicarb of soda in place of commercial cleaners. It can be awkward and messy in some situations though, like on vertical surfaces, and I like to use a spray cleaner then. The 'eco' one I've used for years is Orange Power, which is made from orange oil. It smells nice, its natural, and works as well as chemical versions.

A while ago though I read about making your own Orange Spray and I filed it away in my mental filing cabinet (that one with all the jumbled folders and papers falling out of every drawer!) and its been on my mind for a while as a 'must try' project.

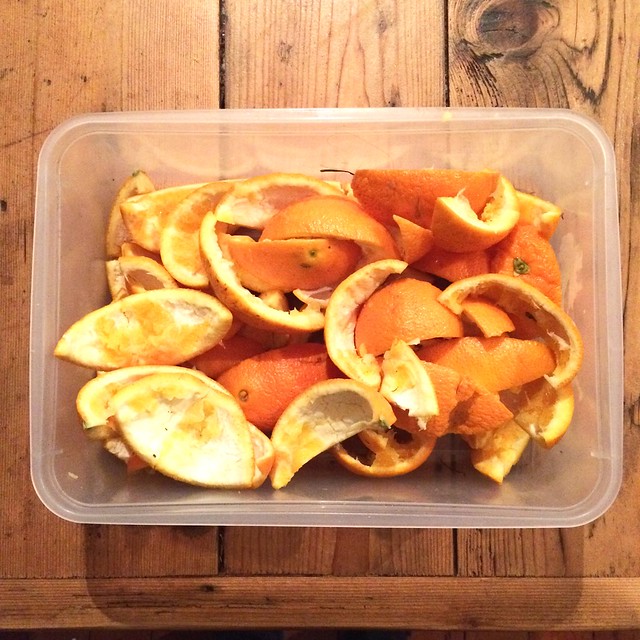
Fast forward to the other day when we were on orange duty for the boys' soccer game. I came home with a large container of orange peels. A light bulb went on, at last I was ready to make some spray. You might have seen my post on instagram. Here's the method I used in case you want to make it too.

Orange Spray Method

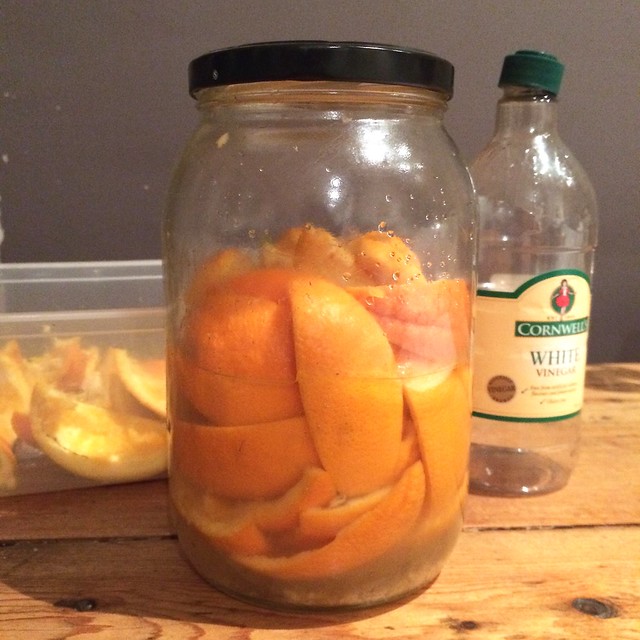
Take a large jar or container (I used this big jar left over from bulk buy kalamata olives. It holds about two litres worth of liquid.)

My oranges half filled the container which I then covered with white vinegar, about one litre's worth.

But first I washed my peels and removed the left over orange flesh.

From what I read you can either fill the jar in one go like I did or add orange, lemon or mandarin peels as you have them till the jar is full. Keep the jar on the kitchen bench or pantry and fill it as you go. They don't seem to rot or go off, I suppose the vinegar preserves them.

When the jar is full put it aside for two weeks at least to absorb the citrus oils. You know its working when the liquid changes colour to orange.

Then strain out your peels and pith, put your orange spray into a recycled spray bottle and away you go! Smells delicious and works well.

p.s. Yes that's a mandarin, no oranges in the house today!!

Tuesday, 4 February 2014

homemade eco laundry detergent

washing detergent
Exactly a year ago I decided to try making my own clothes detergent. I saw people doing it online and thought I'd try it myself.

I liked the idea of making my own eco-friendly detergent without nasty additives and I'd read that it was easy and much cheaper than buying it. On top of that I was sick of dragging home heavy bottles of detergent and hated the packaging waste.

And is it good?

Yes!!
detergentjug

Truth is I haven't bought any premade detergents since February last year and I figure I've saved myself a lot of money in that time. (To see how much I've made a price comparison for you below between bought and home made.) I also love that when I run out (invariably on the weekend) its a simple thing to pull out the ingredients and make another batch rather than having to drive to the shops and buy more.

All the recipes are very similar but I think I based my measurements initially on this one. This batch makes a bucket full, about nine litres. You can also make dry powder but I've always found that makes my sensitive skin itch.

homemade detergent

Ingredients
1 and a half litres of water
1 cup soap flakes or grated soap (I use Lux flakes because its quick and easy.)
1/2 cup borax
1/2 cup washing soda
10mls eucalyptus oil (optional but I love the smell and I guess I'm used to scented detergent)

clothes detergent
Equipment
Bucket, containers for finished soap, pot, wooden spoon, measuring cup, funnel if you have one. I keep my ingredients together in the pantry and in the washing soda container a copy of the recipe so its there when I need it.

Method
Put one and a half litres of warm water in a pot and put on the stove on medium to high heat.
Add 1 cup soap flakes or grated soap and stir till it dissolves (above).
Add 1/2 cup borax and 1/2 cup washing soda and stir to combine until the mixture thickens (below).
Pour mixture into a bucket and fill with warm water.
Stir to combine.

washing detergent

As it cools the mixture thickens so keep stirring or the top will harden and you'll have to stir it to break it up again. I keep the bucket in the bath and stir it when I walk past.

When the detergent is cold decant it into bottles. A jug or a funnel makes this process easier because the mixture is quite thick by this time.

And that's it! How easy is that? Once you get into the routine its a pinch and much easier than dragging it home from the shops, paying ten times as much and now you know exactly what goes into it, all eco friendly ingredients.

washing detergent
Price comparison
The other day I was in Woollies and noticed the price of the detergent we'd been using (photo below). It was a nice reminder of the money we are saving. The five of us go through a lot of washing detergent, what with sport and school and work and everything.

I sat down and made a price comparison based over ten litres for the basic ingredients. And even I was pleasantly surprised. My homemade detergent is 15% of the price, each two litre bottle saves me over $8. Times that by two or three bottles a month and the savings mount up.

Homemade per 9L
Lux flakes ($7.19/700g) - 1 cup, 123g = $1.26
Borax - Glitz Green ($7.98/kg) - 1/2 cup, 107g = $0.85
Washing Soda Lectric $3.86/kg - 1/2 cup, 133g = $0.51

Hurricane Top Loader ($8.99/2L) $4.50/L or $45/10L
Homemade ($2.62/9L)                  29c/L or $2.91/10L

Edited to add
* according to Lisa on instagram you can even lower the amount of borax, which helps make it friendlier for her husband with psoriasis.
* there are no foaming agents so it is initially quite disconcerting because it doesn't foam.
* I have been meaning to further thin it because it can come out in a bit of a glob because its quite thick.
* All the ingredients I found in the soap powder aisle at my local supermarket.

washing detergent

Tuesday, 3 December 2013

drawstring bag tutorial

drawstringbagtutedrawstring bag tutorialdrawstring bag tutorialmarble bags

I love drawstring bags, they are useful for holding a multitude of things. Just lately I've been making them to hold travel art kits, marbles and lego. Make them slightly larger and they are perfect for book bags, shoe bags or makeup. They make great wrapping for a handmade gift, as well as being a good present in their own right.

The pattern I use is adapted from Pink Penguin's patchwork bag. I like the way it is lined, that it's reversible, that there are no raw edges showing and the neat way the drawstring casing attaches which means all the seams are hidden away inside.

Although you can use two cords to draw it in, I usually make do with one. In fact I have always meant to experiment with joining the two top casings to make one long one. Next time!

A few months ago when I was making a big batch of marble bags I photographed the steps to share a tutorial and then promptly forgot about it. I rediscovered the pics recently and here it is - perfect timing with Christmas so close to make your own marble or treasure bags. A fat quarter of the main fabric is all you need. I have fat quarters of both prints in the shop. Or if you want to buy the bags readymade, marble bags and lego bags as well as marble starter kits with Alisa's beautiful instructions and including marbles and chalk they are there too.

Step one
Cut all the pieces for your bag.
2 x outer fabric, I've used my marble fabric here.
2 x lining, I've used plain calico for practicality, but the bags are reversible so it would be nice to use a patterned lining too.
2 x drawstring casing - I like to use a contrast fabric, here its my big bricks lego fabric.

Dimensions
I modified the size of these bags so I could cut two panels from a fat quarter.
The outer and lining pieces are 7 3/4 inches square.
The casing pieces are 8 x 2 inches.

drawstring bag tute

Step two
Turn the ends of the casings over 1/4 inch and press. Turn the folded edge 1/4 inch again and press.
Fold in half lengthways and press again.

drawstring bag tute

Step three
Sew around three sides of the main fabric, right sides facing each other.
Sew down two opposite sides of the lining fabric. (You could sew three sides leaving a gap at the bottom for a smaller seam if you were going to make these reversible but I like how quick and easy and neat it is to sew one seam at the end.


Step four
Turn the main fabric right sides out. Pin the casing fabric with open ends facing up on to each side of the main bag.

drawstring bag tute

Step five
Sew the casing to the main fabric using a small seam, less than 1/4 inch. Trim threads.
NB. It is quickest to use your free arm on the sewing machine and sew this in the round.

drawstring bag tute


Step six
Put the lining, wrong sides out, over the main bag (right side out) and pin along top open edge all around. I've folded it back at the bottom so you can understand the placement better. Casing stays as sewn flat against the sides of the main bag.
Sew 1/4 inch or slightly larger seam around the top with seams open out as shown in second photo.

drawstring bag tute


drawstring bag tute

Step seven
Pull the lining forward and press with the lining sitting out and casing facing up.

drawstring bag tute

Step eight
Fold edges of lining under to form base seam of lining and pin. I prefer this method as it is quicker and gives one continuous seam.

drawstring bag tute

Step nine
Sew shut.

drawstring bag tute

Step ten
Push lining into bag. Press again.

drawstring bag tute

Step eleven
Thread some cord through the top casings using a safety pin to pull the cord through the casing. You can either use one or two drawstrings on your bag, I always stop at one but two is nice too. I've used cord, cotton tape and fine rope for cording. You could even sew your own cord.

drawstring bag tute

Thursday, 21 March 2013

my creative space - teach

teachstampteachstampstampstampstamp

There's a secret I've been keeping for a little while now, a plan I've been hatching with my new friend Melissa. I've been dying to share it but I wanted to wait until it was all organised and unveiled.

Melissa Tan opened her new craft classroom space and shop SewMakeCreate at the end of last year in Sydney's Inner West, my part of town! SewMakeCreate is a wonderful little crafting and sewing space and shop close to Broadway Shopping Centre, tucked away down a closed off leafy street in Chippendale.

Melissa has come to her new venture from the fashion world. She's a maker too and has an Etsy shop. Introduced by mutual friend Sue (my first friend on Etsy) we hit it off at our first meeting and bonded over a love of craft and sewing and our desire to share that with others.

I also fell in love with her too cute sidekick Pepper above (a 'puginese') who helps her run her creative space. What a sweetie!

I'm very excited that I'm going to be part of  SewMakeCreate, hosting my first ever craft classes at SewMakeCreate next month! The class I'll be teaching is a two part workshop on something dear to my heart, Eraser Carving for Paper and Fabric printing. (Other classes include crochet, sewing, watercolour painting.)

If you've followed my blog for any length of time you'll know that block printing is one of my favourite things. I love the simplicity and speed of the process. I love the way you can experiment easily and make unlimited different designs with just a few stamps. How you can print or combine those stamps in many different ways to make new designs. Or the many and varied applications, from envelopes to bags that you can print with them.

And you don't need to be a great artist, some of the most beautiful designs are made with simple shapes.

I can't wait to share this style of printing with others. I've loved the recent workshops I've been part of, there's something really inspiring about being part of a group learning and crafting together. So it will be great to host my own.

If that sounds like fun to you head over to the SewMakeCreate website and see more details about the two part workshop.  All materials will be supplied, you just have to show up. Part one deals with carving your block and printing on all sorts of paper. Part two will see us printing on fabric, and in particular a tea towel and a tote bag. I'm going to bring some of my stamps to play with too.

The best thing about this simple and inexpensive craft is that you can take your stamps and what you've learnt and keep experimenting with it at home. Once you learn to stamp there are so many ways you can use the prints in your life.

p.s. I'm still weighing up options for an alternative to Google Reader, but I know a lot of you have moved across already to Bloglovin. If so you can follow my blog with Bloglovin here.

teach


Thursday, 22 November 2012

my creative space - purple bag

purplepersonpurplepersonpurplepersonpurplepersonpurplepersonpurplepersonverypurple

I was planning to make this bag for Cam's 'bag month' sewalong which I'm embarassed to say I've just looked to see and it was in August. Fail!

This is the verypurpleperson's reversible bag pattern, which is a free download.

Its quite easy (but it helps if you clip the curved seams before! you turn it inside out).

This bag is made with my own Prism block print and lined with Flower Press RickRack fabric in aqua. I've put a little pocket in the blue which will fit my phone perfectly. And I've topsewn with a different colour to the bobbin (woohoo!)

This is not the last version I will make of this pattern, though I might just fiddle with it a bit now I know how its made.

I'm scraping in late for my creative space, so go check out the organised people here.

Thursday, 25 October 2012

my creative space - marble kit collaboration

marble kitmarble kitsmarble kitmarble kitsmarble kitmarble kitsmarble kit
I am so excited to be able to finally spill the beans about this project! These Marble Starter Kits are a collaboration between Alisa Coburn of Ink Caravan and I and we're really proud to share them at last!

It all started last year when Alisa bought a marble bag from the small run I sewed with my newly designed Marble fabrics. I blogged about the making of these small, calico lined, drawstring bags back then. The small batch proved very popular and was sold before it even made it into the shop.

Back then Alisa bought a bag for her daughters and was inspired to make some simple instructions to accompany them. I asked if she'd send me an image when she'd finished, I've said before how much I love Alisa's work, she was a featured Show & Teller this year, so I knew the instructions would be something special.

As you can see, not only are the instructions sweet, and simple, and fun to look at, Alisa has engineered them in a way as to make them durable and easily folded so that even the smallest hands can put them away safely between games. Such tricky folding, I still can't work out how she does it!

Even better just before she sent me the instructions she suggested a collaboration to make these small kits so we could share the marble love. I agreed in a heartbeat as these are just the lovely simple and handmade presents I love to give.

These handmade kits are a labour of love between Alisa and I. Each Marble Kit comes with bag, instructions, marbles and chalk so they are a complete kit and you don't have to chase around for the extras. They can go straight into your secret present cupboard and be brought out again at Christmas, for birthday parties, or for a great little holiday travel game bag that could also hold a pack of cards, some jacks, a pencil and notebook, a complete holiday kit in a bag.

The fabric is my original Marble design digitally printed on 100% Kona cotton. The bags are lined with durable calico and pulled tight with a cotton tape. Alisa's instructions are printed with her new high end pigment ink printer on specialty papers and then hand cut, folded and assembled.

These kits are available in my Etsy shop, and will also be in Alisa's Ink Caravan shop when it opens, (rumour has it that will be soon -I am already lined up at the front door peering through the window to see the treasures she has for sale)!

Thank you Alisa, its been so much fun making these kits with you, I've loved working together and bouncing ideas off each other and I'm so proud of what we've made. And its nice to share them at last.

We hope you love these kits as much as we do, they are in the shop now! I'm putting a whole bunch of new stuff in today which I'll blog about later but you can get a sneak peek now.

More creative types here.