Showing posts with label sew. Show all posts

Wednesday, 25 February 2015

frankie's blankie

Frankie's blankieimageimageimageIMG_1103

Baby Frankie arrived late last year. He is a much loved little brother for Poppy.

Poppy was the first baby I made a quilt for and its still one of my favourites so I'm very happy to hear that baby Frankie is using it in turn. But everyone needs a little blankie action of their own, so when I knew we were going to finally catch up with Mr Frankie, who doesn't live nearby, I wanted to make him something special.

It is inspired by the summer wrap I made little Zoe back here.

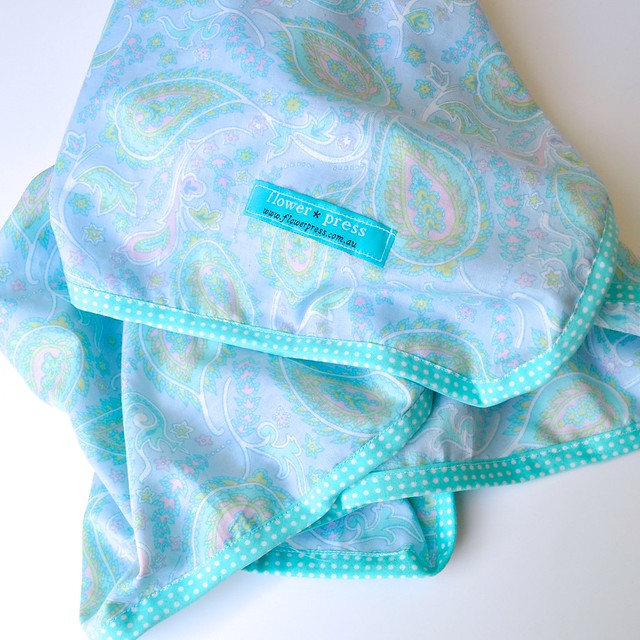
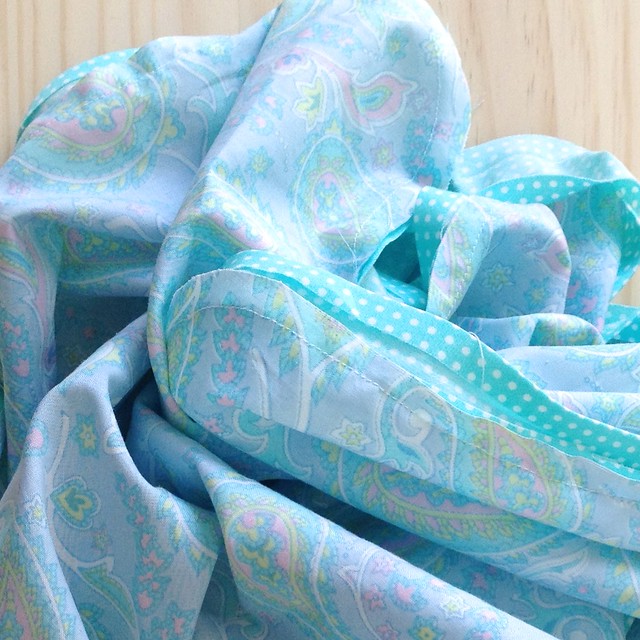
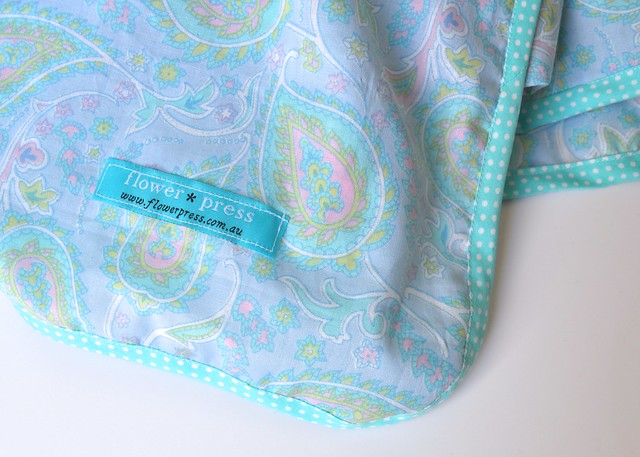
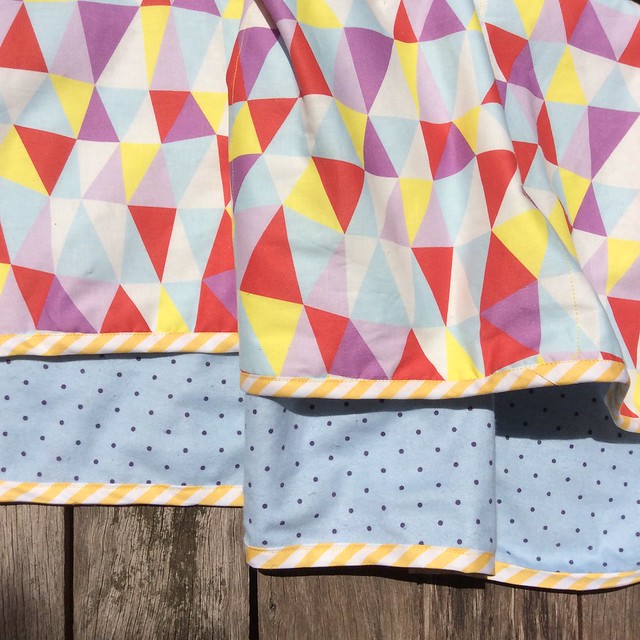
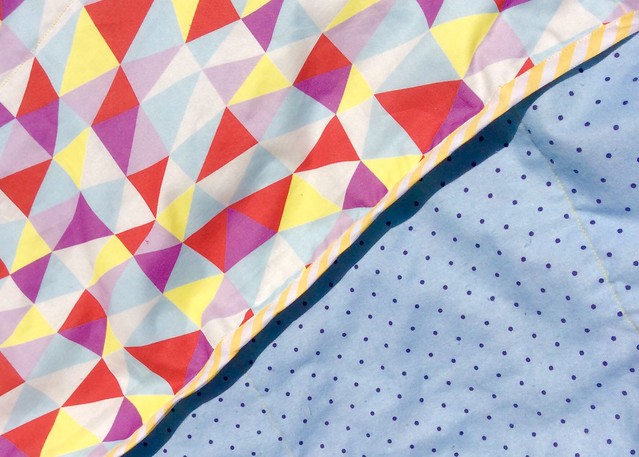
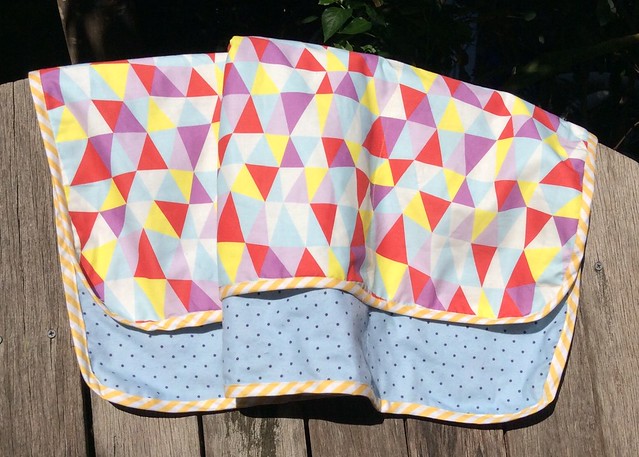
Adapting it for a different season, summer in to autumn, I decided to make a two sided blanket, one side cotton and the other flannel. I wanted a lightweight throw that was easy to drag around, good for car seat or stroller, or big enough to make another layer in the cot. Something soft and cuddly.

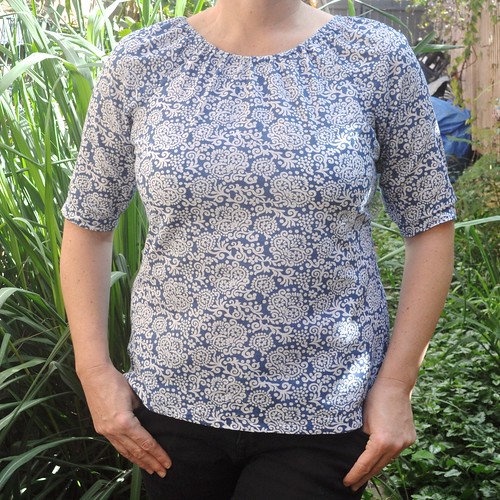
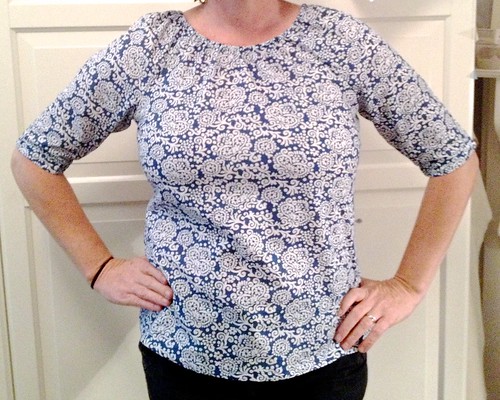
I decided to border it with bias binding because I'm in love with patterned bias. Encouraged by my last successful foray into the dark arts of bias sewing I bought a bright stripy yellow fabric to marry the two prints, my Triangle Twist design fabric and a soft blue flannel with delicate dark blue pinspot. I like the way the colours and geometrics are a little more boyish.

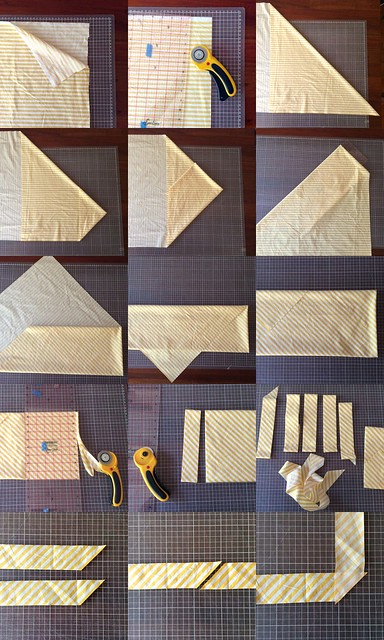
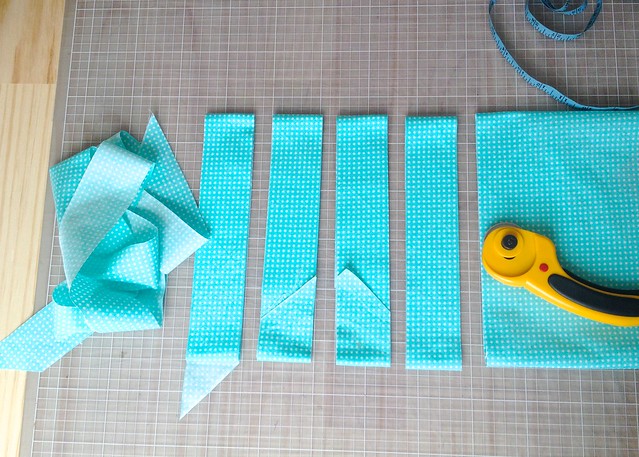
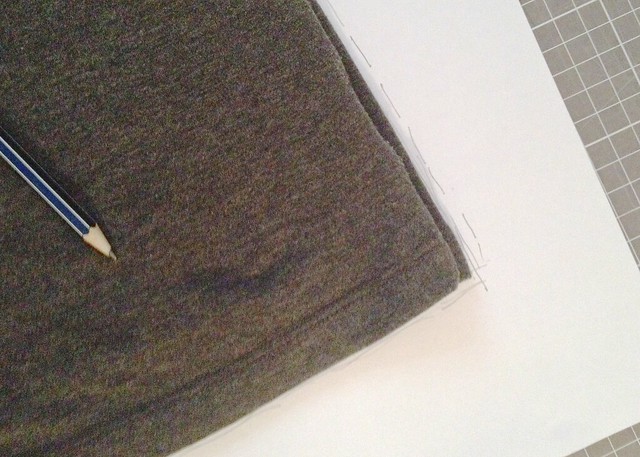
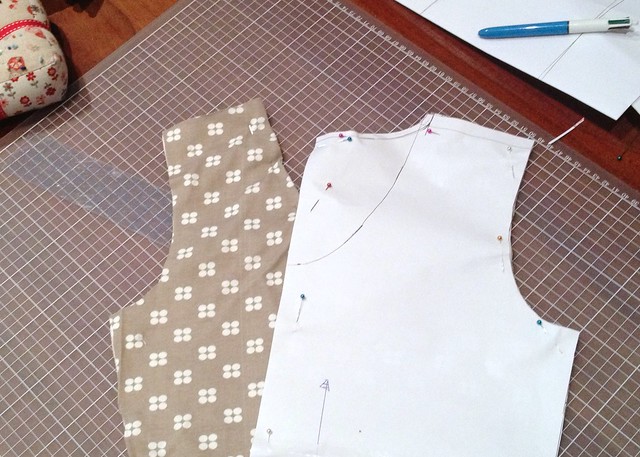
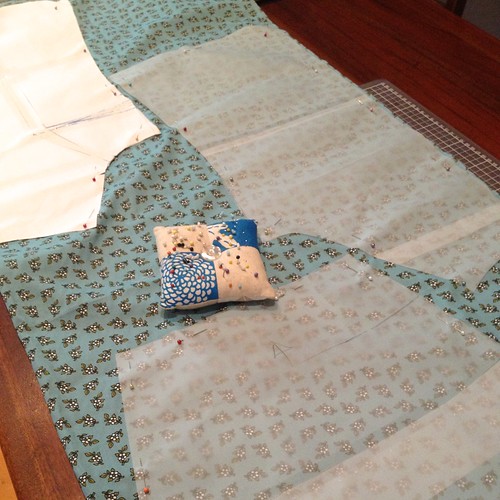
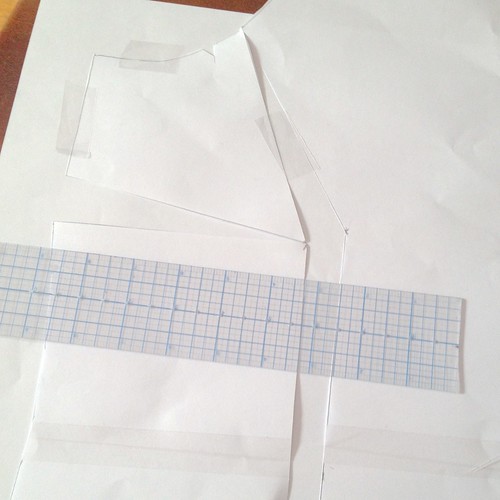
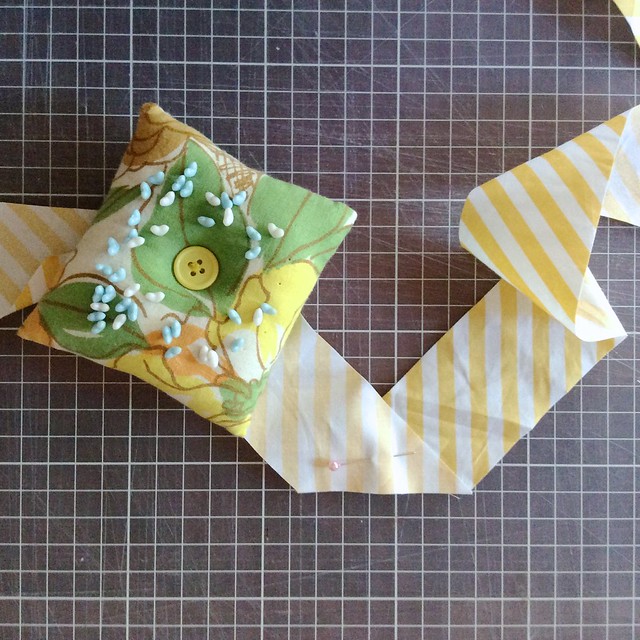
Once you get your mind around the cutting and directioning of Bias binding its really not that difficult. I took some photos this time to remind myself of the process, in particular the folding that gives your strips their diagonal cut. I've reproduced it below in case it might help (and so I don't have to look it up again next time I try this!)

The sewing is tricksy but I figure practice makes perfect and I'm going to keep sewing it till I'm really confident.

There's nothing like starting a new body off with some handmade loving, and its a tradition I really love. Best of all I got the most beautiful photo the other day of Frankie, who is very cute, lying on his blankie so I know its going to be well loved :-)

It was nice to have an excuse to do some making, I've been feeling stretched at the moment, spare time has gone to endless painting of the new bits of house, helping our HSC student, putting the garden to rights and the other endless list of jobs we have around here to finish off our reno. I'm not complaining though I promise, we are loving the extra space and its great being part of the making of our house, in some small way!

p.s. When the good camera is better I'd like to rephotograph it and put up a tutorial so I have it on the blog, but for now here is how you get the fabric to cut on the bias:
trim the fabric square by lining up the selvages;
open it out into one piece; fold the top across to meet the bottom diagonally;
then fold in the other side along that fold, turning until it is all wound up in a rectangle;
cut the end off your 'package' of fabric and then cut your strips the correct width for your bias maker, mine was 1/2 inch double fold so I cut 15/16ths of an inch widths;
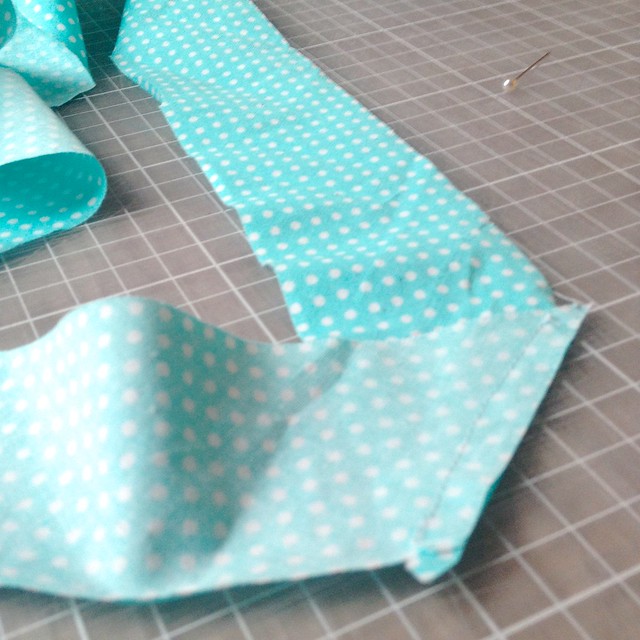
finally make sure you choose two pieces that are cut the same way (hint, they aren't all the same!) and then flip them and pin them like this, overlapping the pointy edges by the margin you are going to sew.

My creation

Saturday, 11 October 2014

Zoe's wrap

Zoe's blanketZoe's blanketZoe's blanketbindingzoe's wrapZoe's blanket

Zoe is a beautiful new member of our extended family. Another baby! My Mr has lots of older brothers and sisters and there is a bit of a baby boom happening amongst their older kids, aren't we lucky!

Our nephew, her father and his wife have a great meeting story, with a very happy ending and a couple of months ago they welcomed little Zoe, their first child. Soon after she arrived they set off for four weeks on a Greek island with family (as you would) so its taken us a while to catch up.

As you know I usually make baby quilts for new arrivals, however I knew that Zoe had already been gifted a beautiful handmade quilt, so I thought long and hard about what I could make instead.

I decided on a light muslin wrap that would serve as shade protection and a light pram cover on hot summer days. Everyone needs a blankie!

Ambitiously I decided that it would be necessary to bind this wrap with handmade bias binding, which I have never made before, or sewn successfully! I did try sewing bought bias once before, for a baby wrap, and it was a big fail, and has intimidated me ever since.

The wrap I imagined had lovely patterned bias though. So armed with a million tutorials, a few youtube videos I finally went for it. And it worked, I'm happy. I can see I am going to be making a lot more bias in the future and practicing my bias sewing skills again.

Its a great way get a unique look to your handmade sewing, a great way to mix and match patterns or solids without having to search out the right colour or use that scratchy stiff bias binding you generally find in the shops.

And the fabric is a beautiful vintage paisley my Mr found for me on his op shopping travels. It's light as air and I love the morning sky blue background.

Monday, 28 April 2014

self drafted tshirt, mark II

self drafted teeself drafted teeself drafted teeself drafted tshirtself drafted tshirt

The short version of this story is:
I drafted my own t shirt pattern and sewed a tshirt!
It fits perfectly, its comfortable and just how I imagined it. Success!
And it cost me about ten dollars, if that.

The long version is this:
I watched Cal Patch's video on drafting a tshirt pattern, and one on sewing a tshirt, and then drafted and sewed my first tshirt, blogged here.

I was pretty pleased with the finished product but only as a muslin, it had a few issues which I'm still resolving, but it was a tshirt and I learned heaps along the way and I beat my fear of sewing jersey fabric.

Just recently Cal launched a new four part series on pattern drafting; making muslins; adapting patterns; and making patterns from existing clothes.

I've spent the last month watching the series, with more than a few 'a ha' moments along the way. It built on the knowledge I'd learnt in her t shirt drafting class and then took it much further. Cal demystifies the process of pattern making and shows you the basics of different styles. I'm a big fan of her simple and straighforward teaching, and I like her thoughts on life and fashion as well. I've also learnt a bit about sewing watching her make her clothes. Seeing every part of the process is so helfpul for a visual learner like me.

The series gave me confidence to revisit my tshirt pattern. This time I started from scratch and used an existing t shirt that I like to draft the new pattern, but I compared it with my original self drafted version and the original muslin using that information to make changes and revisions.

With my heart in my mouth I cut and sewed the new pattern yesterday.

Success! This time it fits perfectly. The neckband is the right length, the sides aren't too loose and the finish is professional. I love it. And best of all I have a bespoke pattern that I can use to make a million more tshirts.

I read more before attempting my second pattern too. In particular Maria Denmark's blog about negative ease and fitting helped a lot. She has a series about fitting tees which I must more of. She also has a boat neck Kimono tee pattern for free download on her great site. I'm thinking of trying a boatneck next time around.

Because I have an overlocker (serger) I sewed the whole tee with it, except for the bottom and sleeve hems. It makes it such a quick sew and gives a professional finish. I used my walking foot and a narrow zigzag for finishing the hems which helps keep them from distorting.

Wednesday, 16 April 2014

built by wendy 3835

built by wendy 3835built by wendy 3835built by Wendy 3835built by wendy 3835built by wendy 383538353835

The Built by Wendy Simplicity 3835 pattern is famous on the interwebs. Everyone has made it, and usually more than once! This versatile pattern is for a top and two dresses with different sleeve lengths and necklines.

Do you know it? Its been out of print for years but still manages to appear regularly on sewing blogs. In fact all the Built by Wendy patterns are popular. And all out of print.

I don't understand why pattern companies, and fabric companies, don't revive some of their more popular designs. I'm sure there are reasons, but when they are still sought after and increasingly rare, I feel like they could do a limited rerelease.

The good news about the 3835 pattern, for me and for you if you don't own it, is that it is available as a digital download from the site sewingpatterns.com along with some of the other Built by Wendy patterns.

I bought the pattern and made this top once a year or two ago. It is a quick sew and takes a tiny amount of fabric. I quite liked it at the time, but wear it rarely because it ended up as they often do too tight across the bust and shoulders, but gapey on the sides where I ended up taking it in.

When I decided recently to finally tackle the world of the FBA, or full bust adjustment, it was this simple pattern I turned to. The FBA if you don't know it is an essential tool if you are a sewer with a larger than B cup. Its also a good first step toward making your own pattern alterations, which leads to more satisfying clothes sewing.

Its taken me a while to learn this secret, but now I'm on to it! My first basic foray into pattern making here also gave me more of an understanding about how it all works, and more confidence to fiddle.

Unfortunately this is a raglan style top and the instructions for a raglan FBA were thin on the ground so it took some dithering around until I just went for it. The only tutorial I could find online was this one. I'm not sure what she does with the dart at the end, so I pressed on and added a dart where one didn't exist before and left it there.

I sewed a couple of muslins with my revised pattern making changes until I was happy with the fit. I actually ended up coming down two pattern sizes. From making a size 16 the first time I sewed this eventually as a 12, using my high bust measurement, adding a FBA and using the size 14 sleeves with slightly extended armscyes to fit. The sleeves are notoriously tight on this pattern.

I then cut the sleeve lengths where I wanted rather than following the pattern, I used the longer dress length sleeve pattern rather than the top as a starting point.

Once I was happy with my revisions I made these two tops in quick succession. I think the blue and white patterned top is the more successful due to the nice drape of this voiley Spotlight fabric which was already in the stash.

But I do love the colour of the blue floral figured fabric and couldn't resist buying it. It has a bit of a starchy, quilty feel but I'm hoping it will wear in a bit. The good news is that both tops cost less than $10 to make and I now have a bespoke pattern that I can make confidently again. And it has given me confidence for altering other patterns.

As usual I hate photos of myself (I enlisted my school holidaying junior photography team for these) but as usual I wanted to pay back all those people who have shared their 3835s online and from whom I've learnt so much. Special mention to the special Built by us Flickr group. Check out my friend Jo's versions, they are all great.

Tuesday, 1 April 2014

adjustments

adjustmentsadjustmentsadjustmentsadjustmentsadjustmentsadjustmentsadjustmentsadjustments

Did you join us in meat free week last week. Perhaps its something that you already do regularly. A couple of people mentioned Meat Free Mondays, which sounds like a great way to keep this issue front and centre in the everyday week.

We managed a week of vegetarian dishes, and it was great. I really enjoyed the restriction and how it made us pull out a week of meatless meals from our repertoire. We ate falafel wraps, Malaysian egg curry*, fried eggs on toast (the night we had an early band performance), minestrone, nachos, marinated tofu stir fry and spaghetti squash with something else, hmmm, sorry can't remember!

During the week the Mr and I did something else for our health, we took a day off and drove down the coast together, had lunch at Stanwell Park and swam in the surf. Bliss! It was meant to rain all day but amazingly we had the most perfect weather! And it was such a great way to recharge. We had tried to have lunch for his birthday the week before but things were too busy. I'm glad we waited, it was a perfect day.

This week is another birthday week at our house, a momentous one in fact! My little baby boys turn 13 tomorrow, they will be teenagers!! When I started writing this blog they were just seven, in fact it only seems a blink ago that we found out I was even having twins. I must share that story some day, talk about a surprise!

And now, as my sister helpfully pointed out, from tomorrow we parents will be outnumbered by teenagers! Wish us luck ;-) Actually I love teenagers. Its such an exciting time, difficult in some ways but also an amazing period of growth and discovery. And they are great to talk to and laugh with... on their good days ;-)

There has been some making this last week, of course, there is always making round here!

Cath put the call out on instagram the other day for volunteers to help crochet washcloths for a really fantastic cause directed at young women. I pulled out some cotton from the stash and my dodgy crochet skills and I've made four so far to contribute. Visit her blog to find out more about this wonderful charity which you also might like to help.

I have still been potting away on my wheel too. I like to think that each time I do my skills improve just a little bit. I'm even starting to have slightly more control over the shapes I'm making. My nine week course finished last week, but I don't have all my pots back to show unfortunately as they were still in the kiln at our final lesson.

I've also been working away on some sewing for myself. It feels very self indulgent especially as I'm trying to alter patterns and learn more about how to do that, which takes a lot of time and brain space. As a result the bits of paper and fabric come out every so often and then get packed away mid alteration.

Despite that I think I might just have managed to do my first successful Full Bust Adjustment. I'm hoping this is the missing link in my garment sewing and that from here I will be sewing less shapeless sacks or bandage tops!

I've been experimenting with the Built by Wendy Simplicity 3835 pattern, and I've just finished a fourth muslin which I'm finally happy with. I'm keen to go back now with this new knowledge and sew a Tova or a Banksia top, two patterns I've attempted before with qualified success. When I have some better photos I fully intend to share what I've learned here. I think its such a good thing. If you are anything more than a B cup this is an invaluable modification.

Anyway that's what I've been doing. How about you? How is autumn/spring treating you. Its still muggy here in Sydney, but the nights are finally cooler which I am loving! And the garden is producing its autumn treats, the grasses are flowering and the camellia is out. I do love seasonal change.

* not sponsored but this was a Marion's Kitchen curry. We love these packs, they make a really authentic curry without too much fiddling. I'm so pleased to see she is expanding the range to include some other cuisines alongside the red and green Thai curries we love.

Thursday, 13 March 2014

learn to sew - draft and sew a tshirt

tshirttshirttshirttshirt

For a while now I've wanted to have a go at sewing stretchy fabrics. Like many people though I have an illogical fear of them, but I was determined this year I was finally going to have a go. It became one of my resolutions.

Last week by coincidence I was on the CreativeBug website, keen to watch a ceramics video by wonderful claymaker Diana Fayt. Creativebug is a subscription site where you pay for access to creative and making video series on a range of topics.

They have an offer where you can get a month's access free so I signed up straight away to watch my ceramics tutorial and then started looking around for other interesting content. The role call of instructors on this site is fabulous, it includes Anna Maria Horner, Lisa Congdon, Heather Bailey, Molly Hatch and Leisl Gibson.

This isn't a sponsored post at all, but just something I've found that I wanted to share.

While browsing I found two videos by Cal Patch - 'Pattern Drafting a TShirt' and 'Sewing a TShirt'. Here was a chance to play a bit with pattern making and stretch sewing all in one project.

I love Cal's presentation style, so calm and easy to follow. Following her instructions I soon drafted up a pattern last Saturday. The next day I was keen to try it out and found some jersey in my stash. I cut out my pattern and sewed this tshirt.

I wish I could tell you it was trouble free. I wish I could tell you it was a perfect fit. In truth there was a fair bit of unpicking, there might have been some bad language, there was a tiny bit of despair.

But rather than throw it on the bedroom floor and be done with it I have perservered and unpicked and resewn and tried to resolve the things I didn't like. And in the process I have learned to sew stretch and not fear it, hoorah!!

Please accept Mr Flowerpress' photo of me wearing my muslin t shirt as proof. Not the most flattering shot but well, I'm a bit averse to selfies at the best of times!

I talked in my wrap up of last year about learning a bit more about adapting patterns to my shape and I learnt lots of things about pattern making from this very simple pattern that Cal helps you draft. It is a great place to start and the wonderful thing about stretch is how forgiving it is shapewise.

The bad things about sewing stretch are trying to hem the bugger in a straight and unpuckered line. After some googling around the interwebs though I found a hint to solve this, you use your handy walking foot. What a difference.

Where I went wrong.
1. I used the wrong, overstretchy fabric, but I was determined to have a no cost project from materials I already had. In future I will buy a simple cotton jersey.
2. I went for elbow length sleeves and had to take them in a lot at the elbow. I think I should have drafted the pattern for long sleeves and worked back.
3. The major problem which I couldn't resolve - I cut the neckline too deep. While there's no real cure for that I will know next time to alter the pattern. I also took in the sides an inch. This might be because of the extra stretchy fabric, but I think I will adapt the pattern when I make the neckline smaller, and move the shoulder seams in a bit while I"m at it.
4. This fabric is a bit uninspired but sewing a muslin from the stash felt good.

Now I do have an overlocker/serger too, I think that helps a lot. I used it on the shoulder and side seams and then the normal machine for the rest. Cal's videos though use an ordinary machine throughout.

If you have been putting off sewing with stretch this is a great place to start.

Sunday, 5 January 2014

2013

flowerpress mosaiccraftmakingcrafting2013 craft

And there goes 2013, just like that!

Actually mentally I'm still in 2013, and will be for a while. I'm still on holidays and have some lovely family camping in my future, hooray. 2014 can cool its heels a moment while I recharge.

An annual tradition round here is this end of year post when I go through my Flickr pages and compile a mosaic or two of my creative life for the year. {and if you're interested here's 2012, 2011, 2010, 2009 and 2008}

Its always a nice surprise to see how busy and productive I've been despite sometimes feeling like I'm getting nowhere and taking too long about it!!

This year is no exception. It was big! Some great important things happened this year and I learnt a lot.

My work was featured in The Sydney Morning Herald's Spectrum Design section.

I taught my first craft workshops at SewMakeCreate.

I did a ceramics course and learnt to throw pots. A new addiction this and I'm already signed up for more in 2014.

I learnt to Shibori, expose my own screens and make coiled brooches at workshops run by other people. It was fun! I tried embroidery. Here's to more learning this year too.

I cooked and ate a lot. A brief flirtation with the 5:2 diet and an increasing dislike for processed food saw me make my own pickles, jam, marmalade, yoghurt, ricotta, paneer, bread, soup, curries, pastries, pizza, dolmades, soap and lots of cake. I also grew more of my own produce, which made me very happy.

I printed lots of fabric. So much that I didn't get round to showing it all on the blog. That's something to remedy in 2014, and sewing more with my flowerpress fabrics is another.

I sewed some more clothes for me, and I thought and read a lot about learning to adapt patterns to my particular shape. That's another thing I want to pursue further this year.

I dithered in my bloggings and was quiet for some of the year. I can see from the comparative number of posts that I wasn't as present here. However, the absence made me realise blogging's importance in my life. I hope to embrace it anew. This year I hope to be a more focussed and committed blogger. Another thing I really enjoyed this year was getting out and meeting more bloggers in person, both friends I've met through the blog and via ABCD meetups and the Voices 2013 competition. Bloggers are such lovely people and its nice to have a chance to catch up on all that stuff that you never talk get a chance to talk about in emails.

Do you have plans for 2014, I need a few more ideas for the year, and I'd love it if you wanted to share yours here. And Happy New Year!!!  Here's to 2014, but not just yet ;-)

Tuesday, 3 December 2013

drawstring bag tutorial

drawstringbagtutedrawstring bag tutorialdrawstring bag tutorialmarble bags

I love drawstring bags, they are useful for holding a multitude of things. Just lately I've been making them to hold travel art kits, marbles and lego. Make them slightly larger and they are perfect for book bags, shoe bags or makeup. They make great wrapping for a handmade gift, as well as being a good present in their own right.

The pattern I use is adapted from Pink Penguin's patchwork bag. I like the way it is lined, that it's reversible, that there are no raw edges showing and the neat way the drawstring casing attaches which means all the seams are hidden away inside.

Although you can use two cords to draw it in, I usually make do with one. In fact I have always meant to experiment with joining the two top casings to make one long one. Next time!

A few months ago when I was making a big batch of marble bags I photographed the steps to share a tutorial and then promptly forgot about it. I rediscovered the pics recently and here it is - perfect timing with Christmas so close to make your own marble or treasure bags. A fat quarter of the main fabric is all you need. I have fat quarters of both prints in the shop. Or if you want to buy the bags readymade, marble bags and lego bags as well as marble starter kits with Alisa's beautiful instructions and including marbles and chalk they are there too.

Step one
Cut all the pieces for your bag.
2 x outer fabric, I've used my marble fabric here.
2 x lining, I've used plain calico for practicality, but the bags are reversible so it would be nice to use a patterned lining too.
2 x drawstring casing - I like to use a contrast fabric, here its my big bricks lego fabric.

Dimensions
I modified the size of these bags so I could cut two panels from a fat quarter.
The outer and lining pieces are 7 3/4 inches square.
The casing pieces are 8 x 2 inches.

drawstring bag tute

Step two
Turn the ends of the casings over 1/4 inch and press. Turn the folded edge 1/4 inch again and press.
Fold in half lengthways and press again.

drawstring bag tute

Step three
Sew around three sides of the main fabric, right sides facing each other.
Sew down two opposite sides of the lining fabric. (You could sew three sides leaving a gap at the bottom for a smaller seam if you were going to make these reversible but I like how quick and easy and neat it is to sew one seam at the end.


Step four
Turn the main fabric right sides out. Pin the casing fabric with open ends facing up on to each side of the main bag.

drawstring bag tute

Step five
Sew the casing to the main fabric using a small seam, less than 1/4 inch. Trim threads.
NB. It is quickest to use your free arm on the sewing machine and sew this in the round.

drawstring bag tute


Step six
Put the lining, wrong sides out, over the main bag (right side out) and pin along top open edge all around. I've folded it back at the bottom so you can understand the placement better. Casing stays as sewn flat against the sides of the main bag.
Sew 1/4 inch or slightly larger seam around the top with seams open out as shown in second photo.

drawstring bag tute


drawstring bag tute

Step seven
Pull the lining forward and press with the lining sitting out and casing facing up.

drawstring bag tute

Step eight
Fold edges of lining under to form base seam of lining and pin. I prefer this method as it is quicker and gives one continuous seam.

drawstring bag tute

Step nine
Sew shut.

drawstring bag tute

Step ten
Push lining into bag. Press again.

drawstring bag tute

Step eleven
Thread some cord through the top casings using a safety pin to pull the cord through the casing. You can either use one or two drawstrings on your bag, I always stop at one but two is nice too. I've used cord, cotton tape and fine rope for cording. You could even sew your own cord.

drawstring bag tute